
Installing a Replacement Guide Tube or Adjusting a Current One
Note: You'll need to remove your current Guide Tube before installing the new one.
Tools & Supplies Needed:
- A fully assembled guide tube kit
or
- Guide Tube
- 2 black/green stoppers
Note: If you do not have any black/green stoppers, you can use 2 additional Zip Ties in their place.
- 3 Zip Ties
- Micro cutters
If you have a fully assembled guide tube kit, watch the video above.
If you don't have a fully assembled guide tube kit, read the guide below:
- Turn on the kiosk lights.
- Remove the filament spool and handle from kiosk.
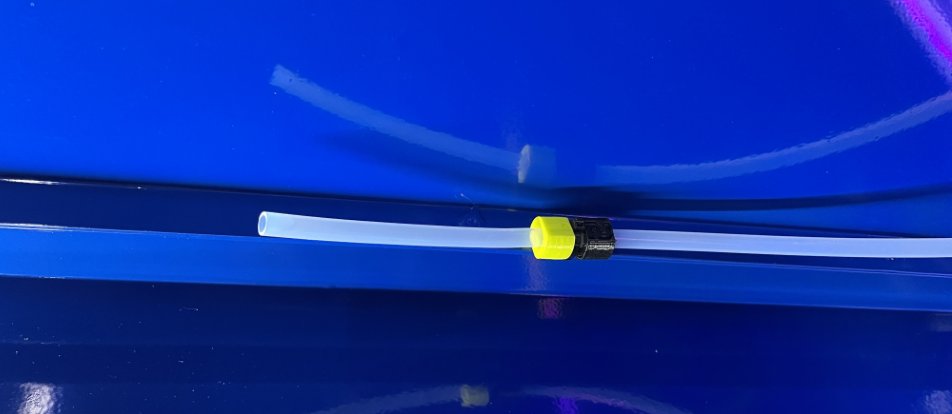
1.0 Push the stopper towards you so that there is about 5 cm (2 in) from the end.
1.1 Add the second stopper and push so that there is a small gap between the two stoppers.
2.0 Thread a zip tie through the hole in the cabinet and tighten the zip tie around the tube between the stoppers. Then cut any remaining zip tie tail.
2.1 Push stoppers together so that it “sandwiches” the zip tie.
3.0 Pull the silver key chain ring closer to the center of the tube so that there is 40cm (16 in) between the stoppers and the silver ring.
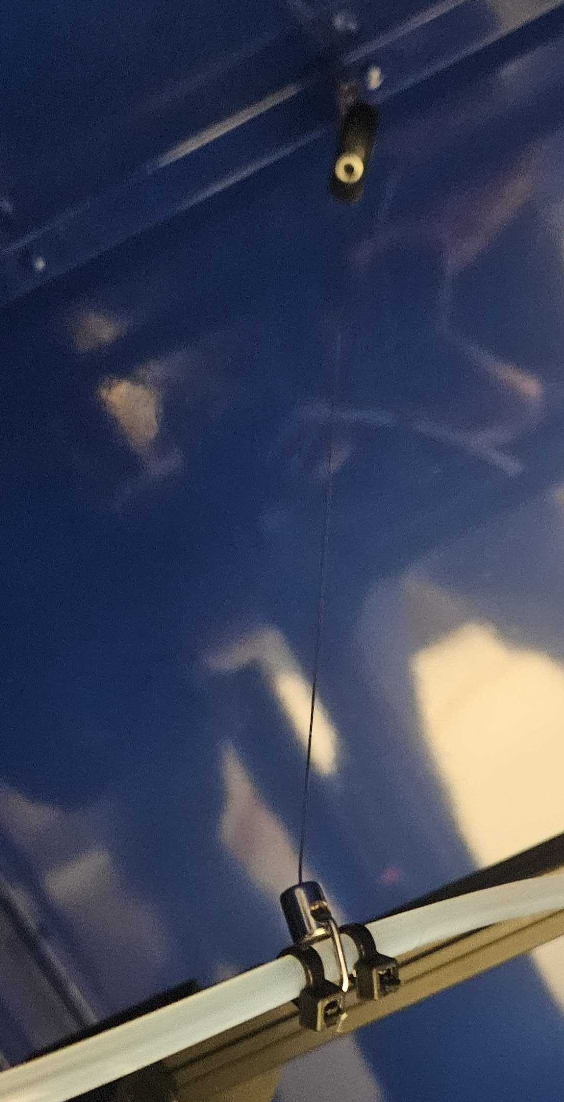
4.0 Add zip ties on either side of the key chain ring and cut any remaining zip tie tails.
**Congrats!!! The guide tube is set up! **