
1. Load Filament
To load copoly filament, chick "Change Filament" on your printer screen. Then, tap the temperature button in the top left.
Set the temperature to 270.
Set the green tension lever by pushing it all the way back away from you. Then, 3 clicks forward towards yourself.
When you load filament, let it extrude about 6 inches to purge any prior loaded filament.
See more general loading tips here.
1.png?width=670&height=335&name=download%20(1)1.png)
2. Swap to the copoly printing bed
Lift the old bed plate off using the blue or green handles. Lay the smooth copoly bed down, and it will snap into place.
Note: When swapping to the Copoly Printing bed, you may need to raise the Z-Offset to compensate for the thicker bed. Be sure to note your original Z-Offset before you change it. Here is our Setting the Z-Offset Guide!
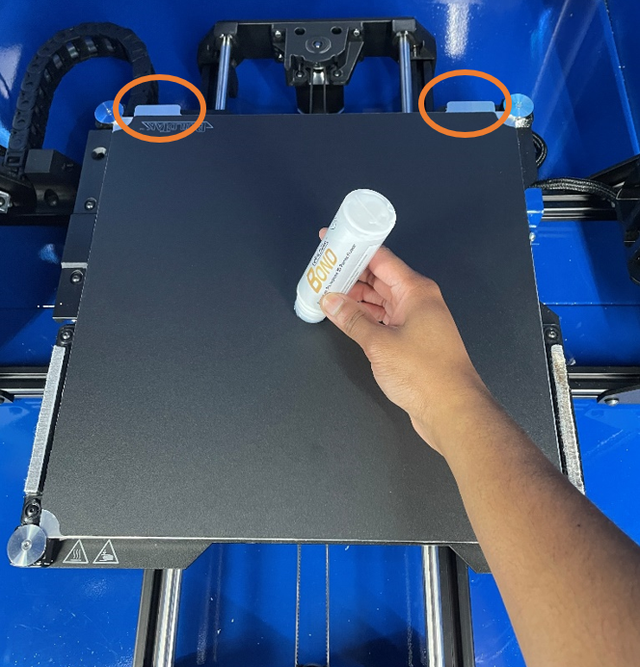
3. Prep Copoly Plate with BuildTak Bond:
- Apply BuildTak Bond on cold Copoly plate.
- Click Preheat on the main screen to heat the bed up to 60°C. Let the bed sit for 10 minutes as it dries.
- After the Bond dries, you are ready to start printing. Feel free to start your first Copoly print and let us know how it goes!
Note: The layer of BulidTak Bond will last for 5 prints before having to be cleaned and reapplied.

Removing Copoly from the Print Bed
1. After a print has been completed, select Preheat on the Main Screen to heat the bed to 60°C.
Note: Wait for the Bed to reach it's 60°C Temperature before continuing
2. Using the scraper, Carefully peel the print from the bed, being sure not to use too much pressure. We don't want to remove the bed's coating or anymore glue than necessary