
What You Need:
- LCD Screen
- 2.5 mm Hey Key
Removing the Old LCD Screen:
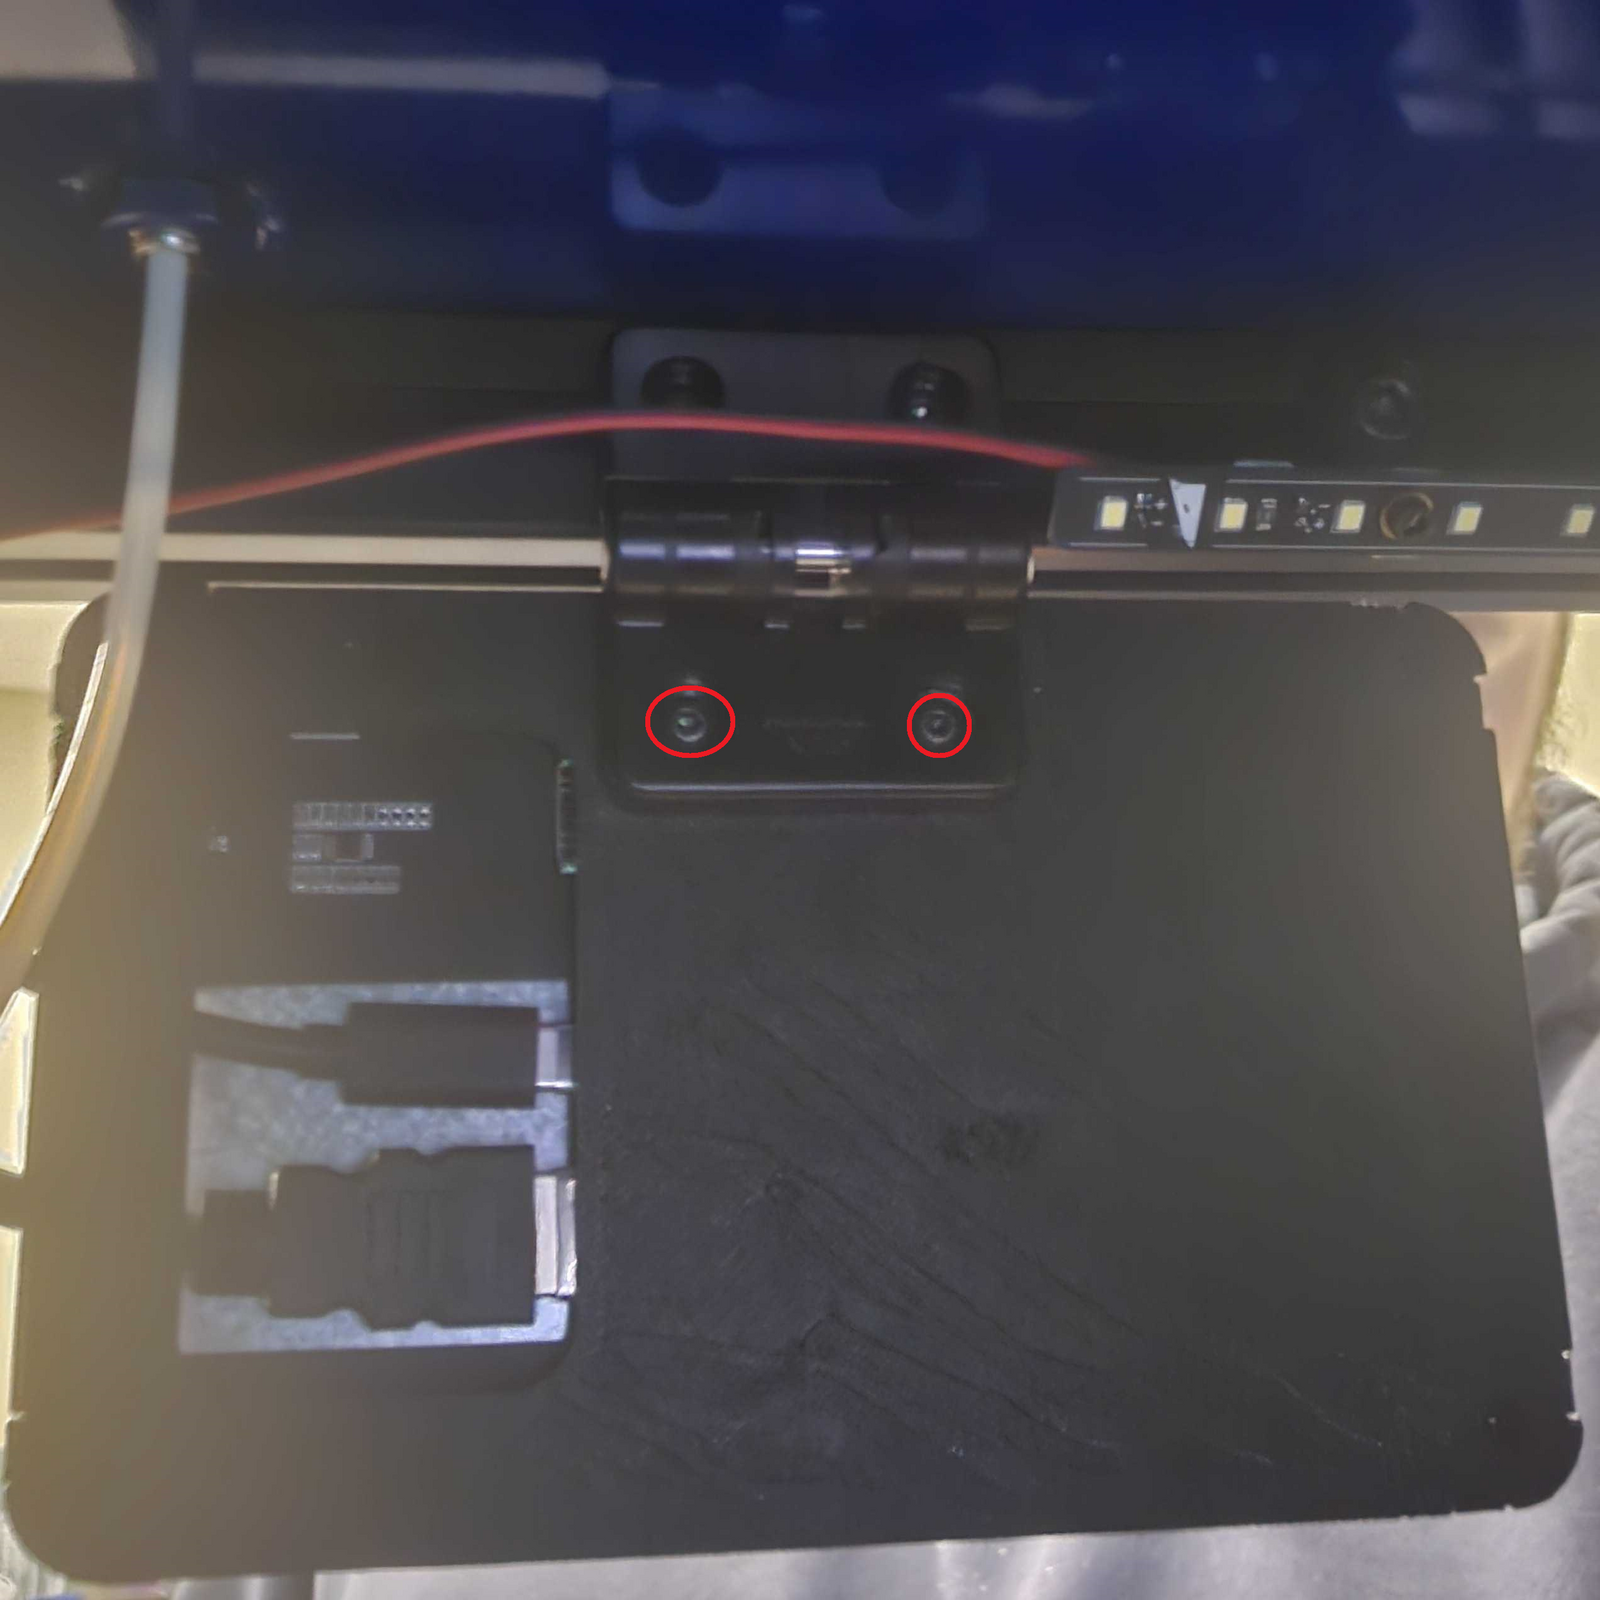
1. Behind the LCD Screen, you'll feel a hinge towards the top middle on the backside of the LCD Screen's Frame. Remove the 2 M4 Bolts holding the frame to the LCD Screen.
Note: Do not remove the Hinge from the Printer! Remove the LCD Screen from the Hinge!
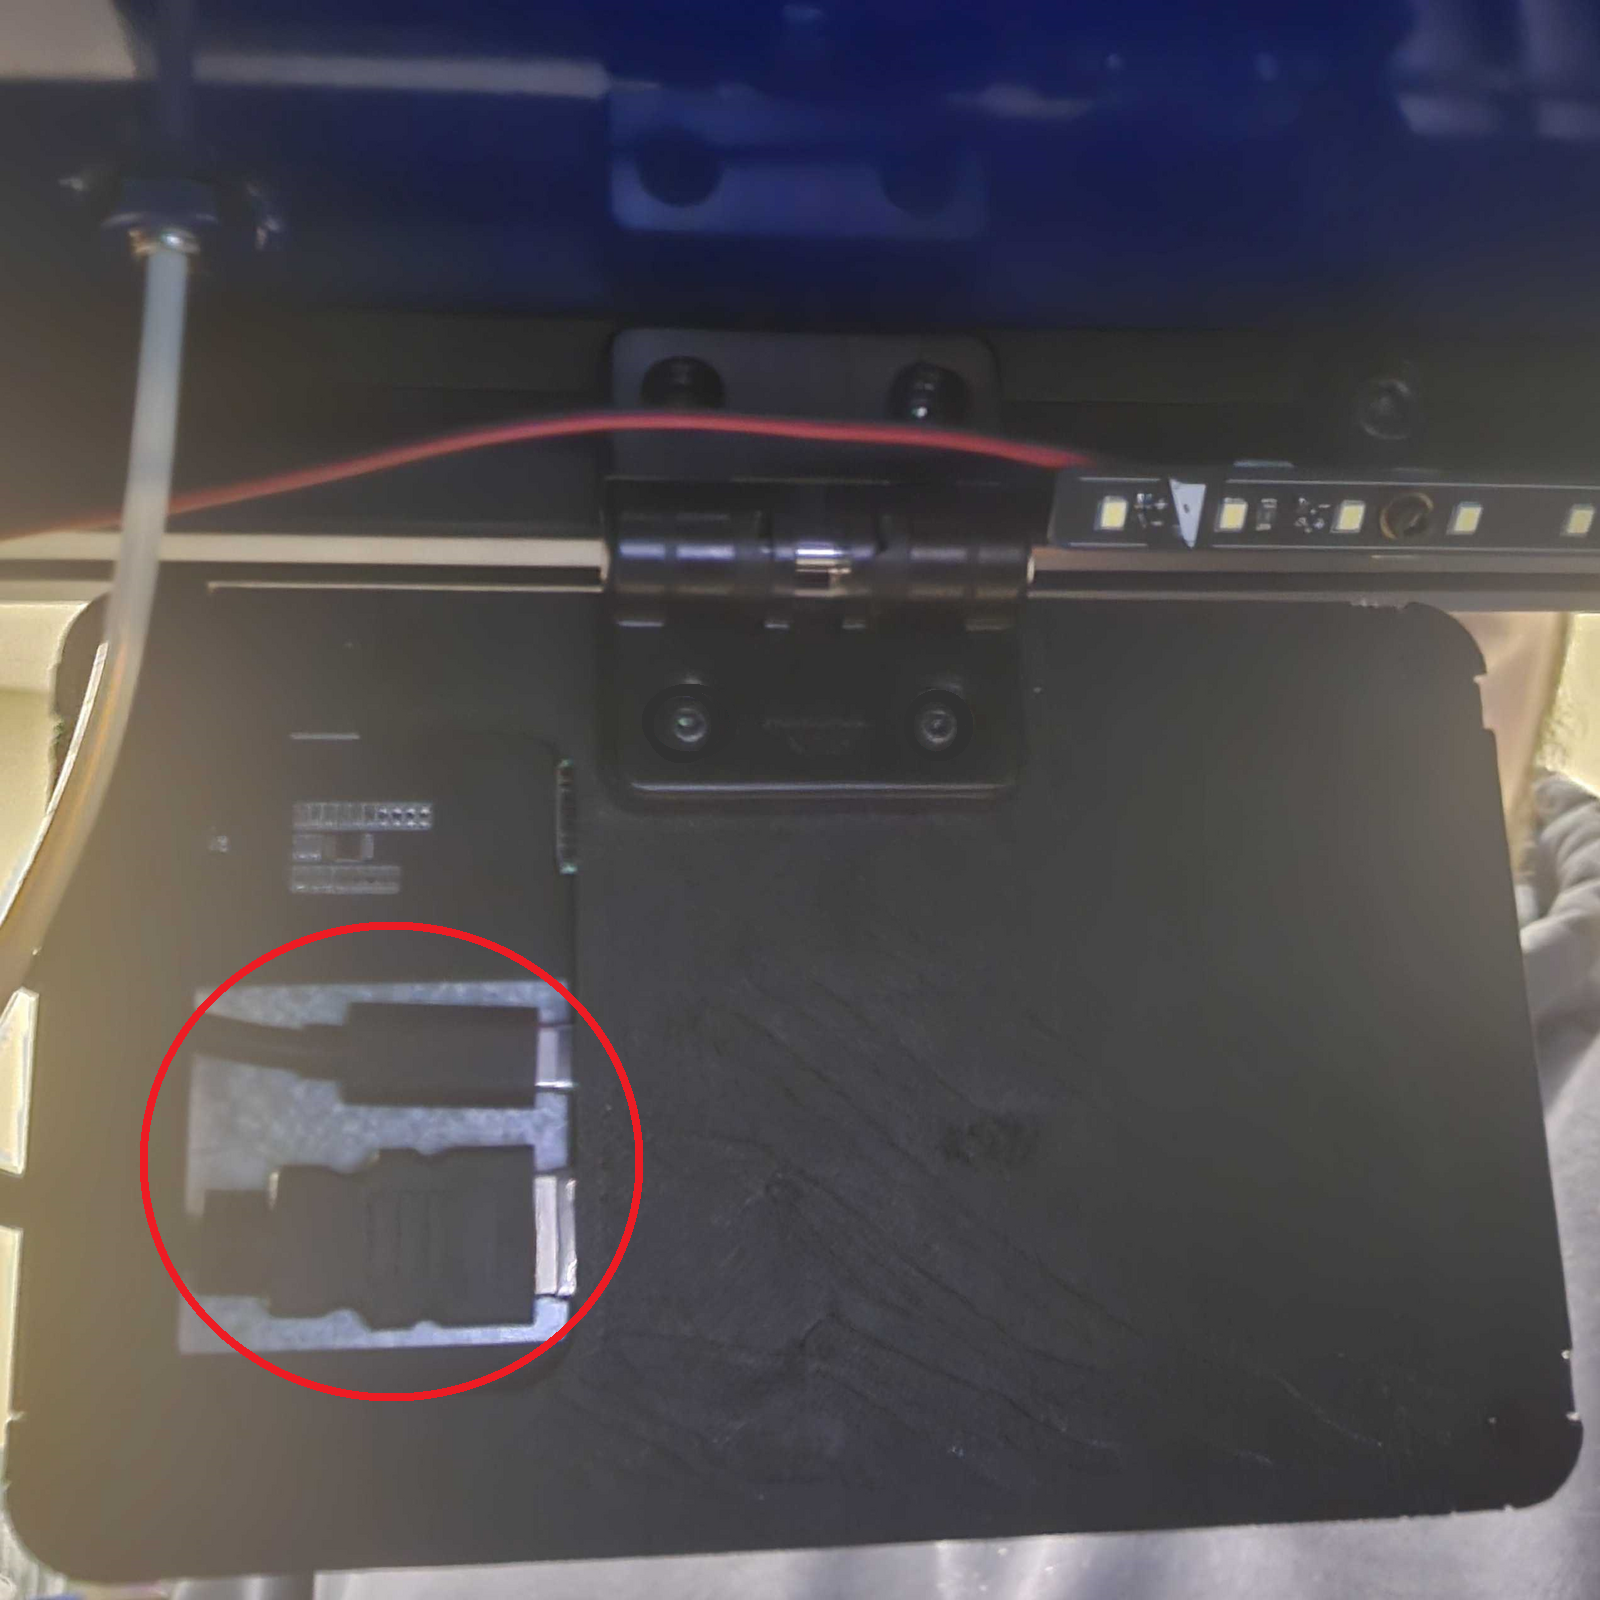
2. After removing the LCD from the hinge, Look on the non-Screen side of the LCD screen for an HDMI Cable and USB-C Cable. Unplug both of these connections.
4. If the issue with the screen is resolved, reattach the LCD Screen to the hinge from step 1. If the issue isn't resolved, unplug the cables from Step 2 above and continue to Step 2 below.
Note: Do not remove the Hinge from the Printer! It is more difficult to attach the hinge to the printer than the LCD to the attached Hinge!
Step 2: Swap the Cable Bypass
1. Turn the printer off by unplugging the power cable.
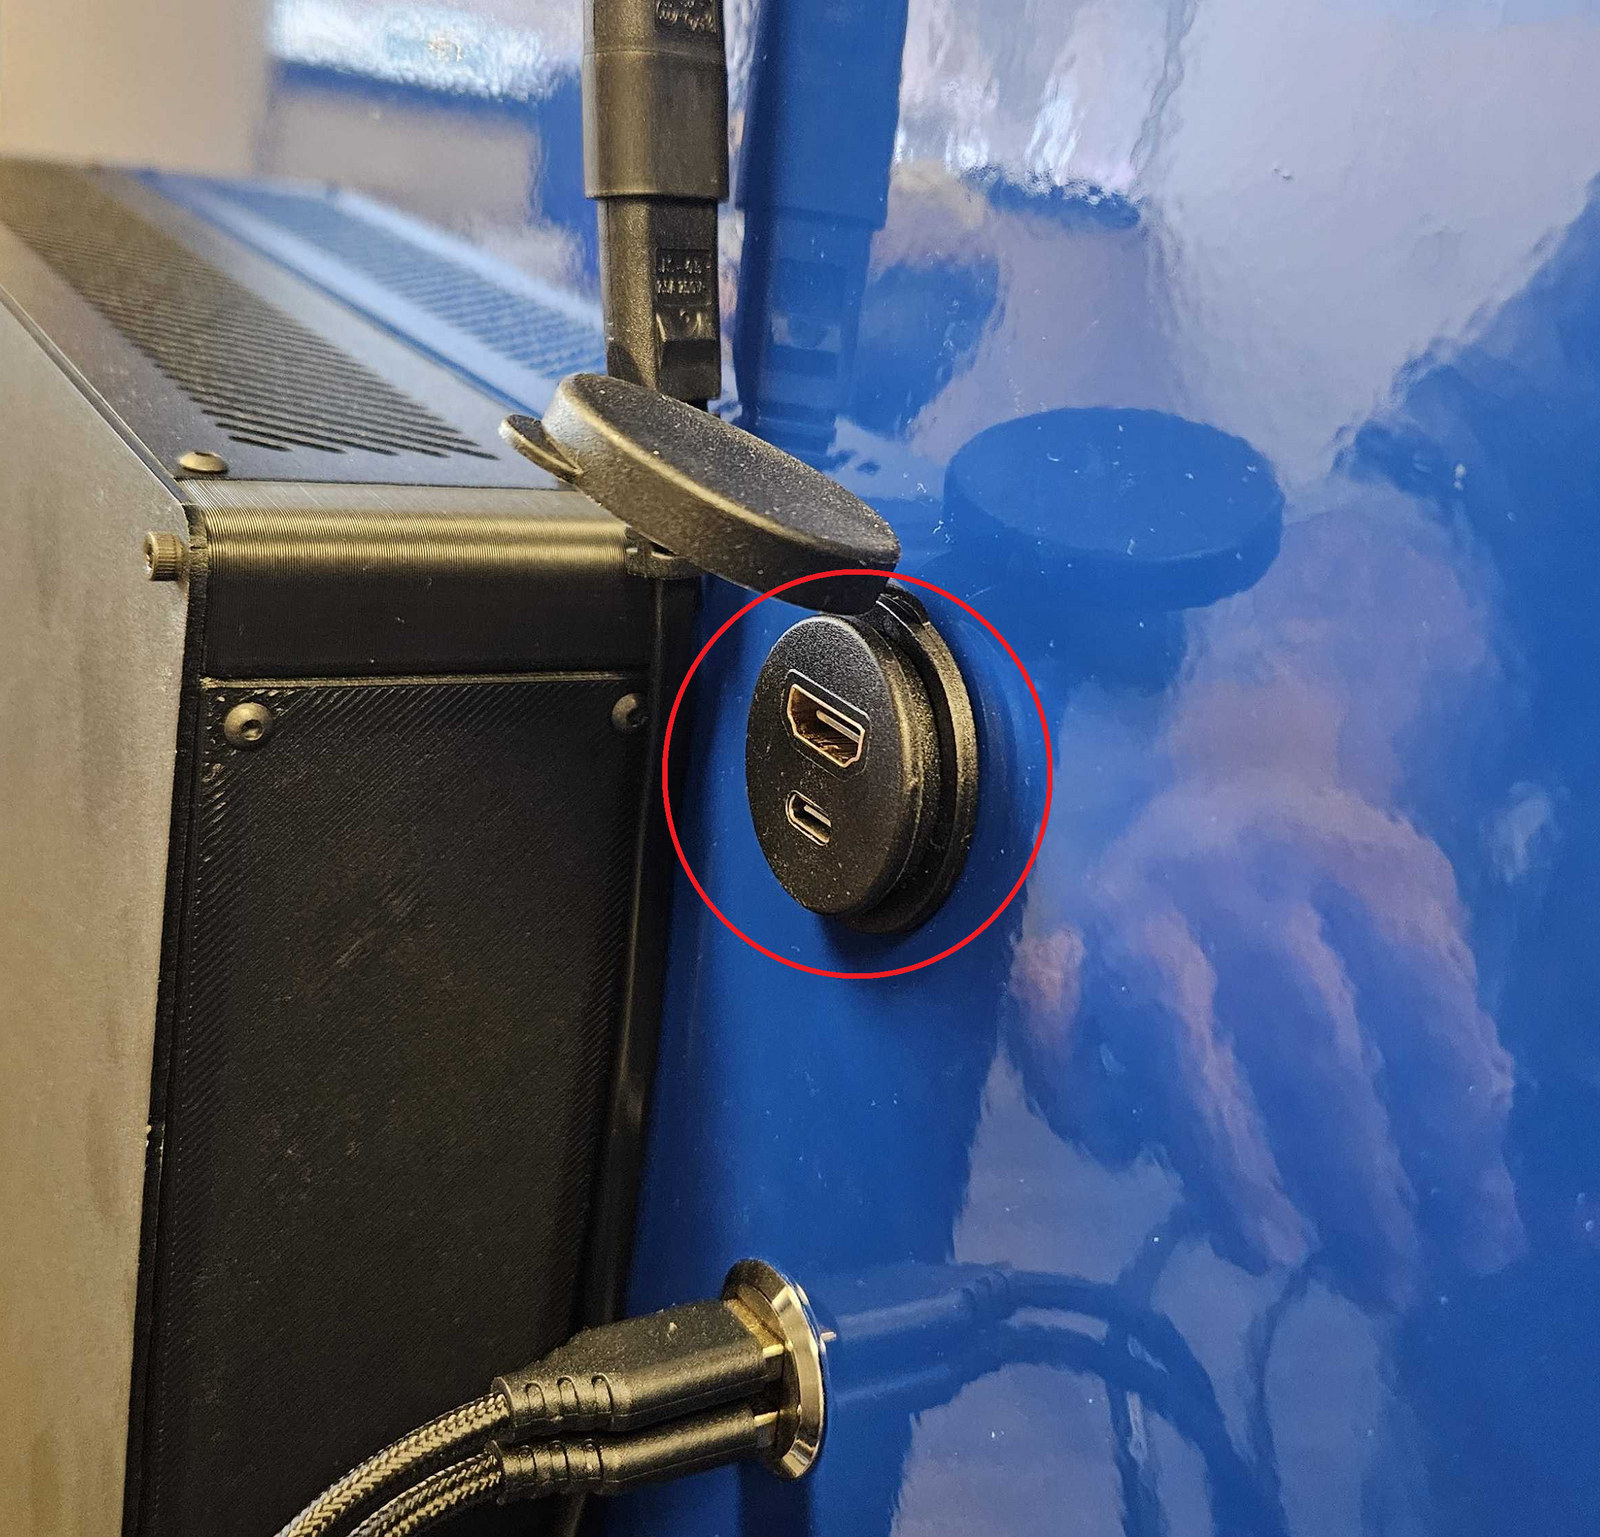
2. On the back of the kiosk, look to the top right of the electronics box and unplug the USB-C and HDMI cables:

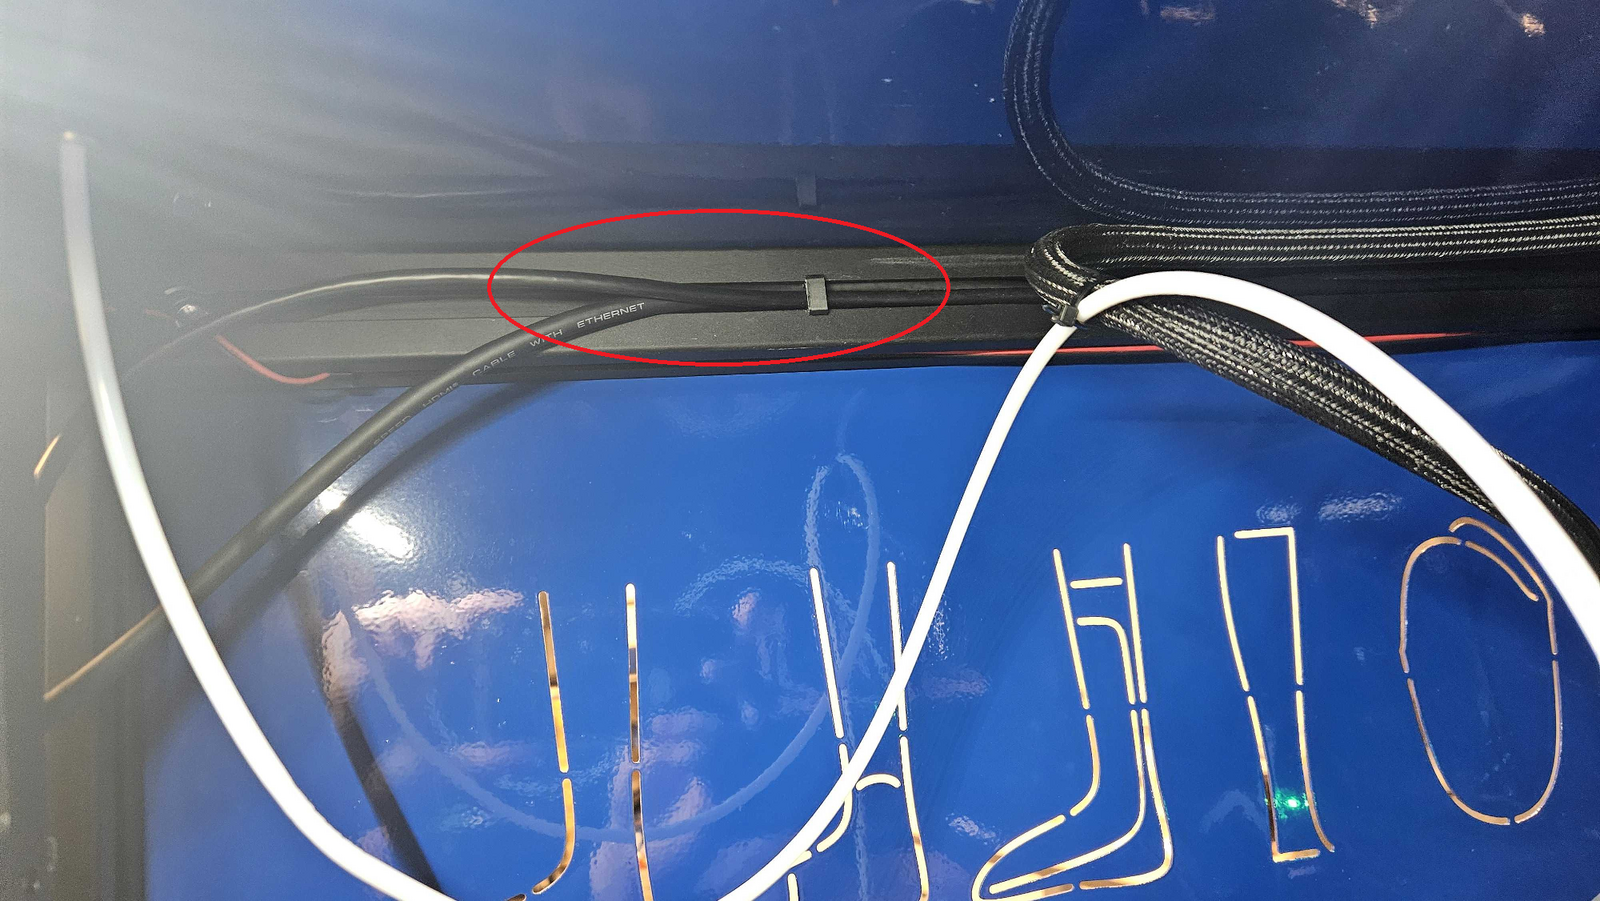
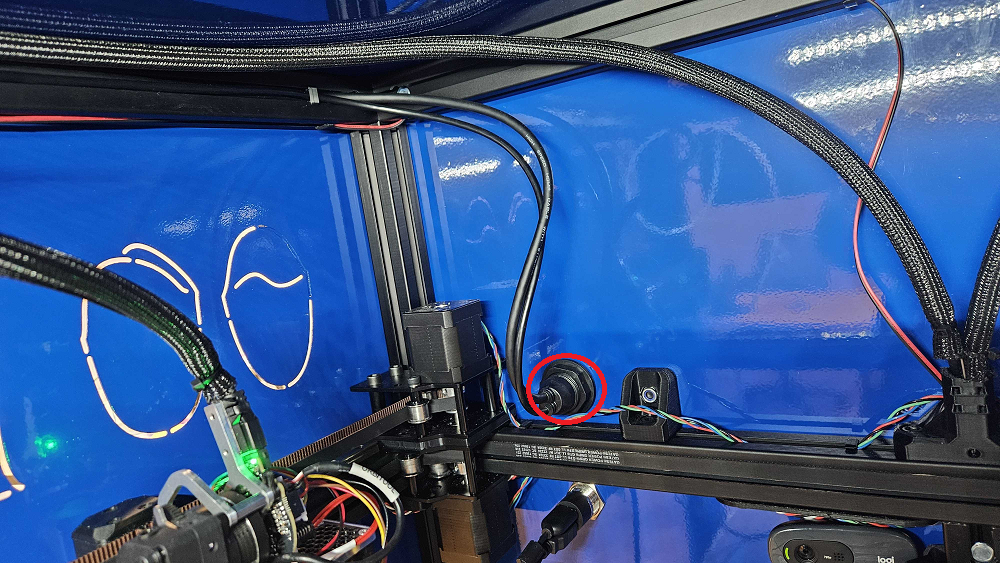
3. On the inside of the kiosk, you'll see a cable bypass on the top left of the printer. Carefully grab the HDMI and USB-C cables, then gently pull them to release the 2 cable clips.
Note: The cable clips will dislodge and may be lost. There's a bag of cable clips in case the currently installed clips are removed post pulling.

4. On the back wall of the kiosk, rotate the cable adapter the HDMI and USB-C cables are pulling from. The adapter is finger tight, so it should rotate easily.
5. With the Adapter loose, push it through the back of the kiosk with the HDMI and USB-C Cables. Grab the Fastener so it doesn't fall to the kiosk floor.
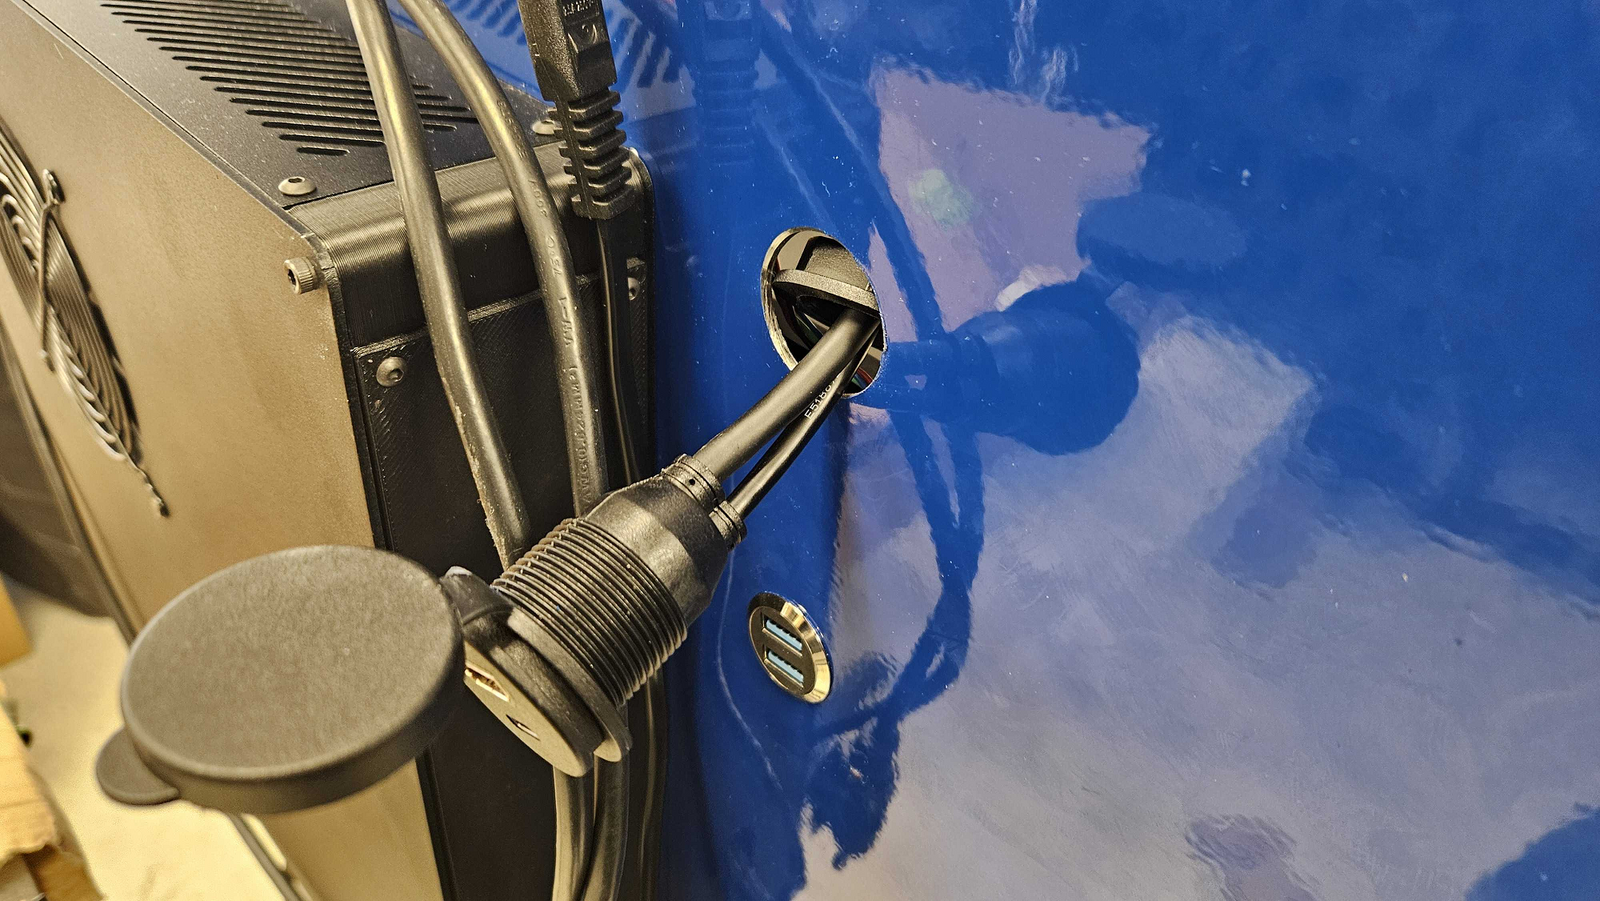
6. Insert the new adapter and tighten the cable adapter with the fastener.
7. Push the cables into the bypass and fasten them with the cable clips. Big wire goes in first, then the smaller wire, then the cable clip.

8. Plugin the HDMI and USB-C cables into the LCD Screen and the back of the kiosk.


9. Plug the Power Cable into the Kiosk and wait for the LCD to come on.
10. If the issue with the screen is resolved, reattach the LCD Screen to the hinge. If the issue isn't resolved, let Protosthetics know over chat or over the LMS ticket.