
When ordering a socket on FabOne, it is key to our design process that we verify the sizing of the scan is accurate to the object you are scanning. While Galileo's design team will gladly do this for you, we offer clinics the ability to do this sizing validation themselves to have more visibility into the process and speed up their design turnaround.
It is common for a scan to gather the correct shape of the patient, but sometimes be slightly off from a patients measurements due to a number of scanning factors including hardware, lighting, and the scanning process. As such we have found that verifying the accuracy of the scan before we start is a best practice to ensure the quality of your printed product.
Video Tutorial
Here is a quick video tutorial from one of our Galileo Leads on how to use the Measurement sizing verification portion of the order form. There is a full tutorial with pictures below as well!
There is a SKIP button at the top right of this process if the scan fails to load correctly or you are using a Modified CAD file.
Placing the points
Place two points on your scan, the MPT and the distal end. On an AK it will ask for the Perinium instead of the MPT.
MPT (BK)
Place the MPT point as close to the physical MPT as you can. This will be used to verify the length of the limb.
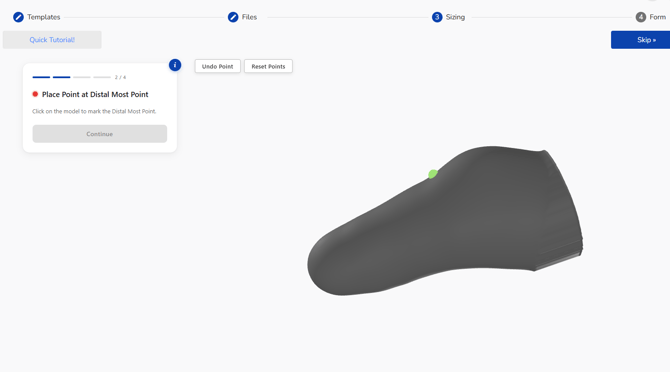
Perinium (AK)
Place the point as close to physical perinium as possible. If you Couldn't get the perinium in the scan place it close and we can move the measurement location in the next step.
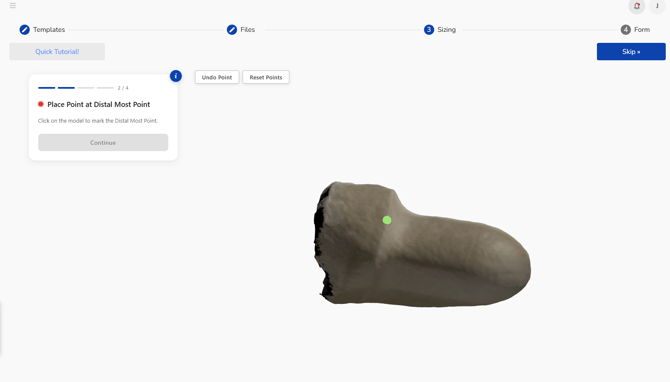
Distal Tip
Place a point on the distal tip of the limb. This will help orient the socket in the next step.
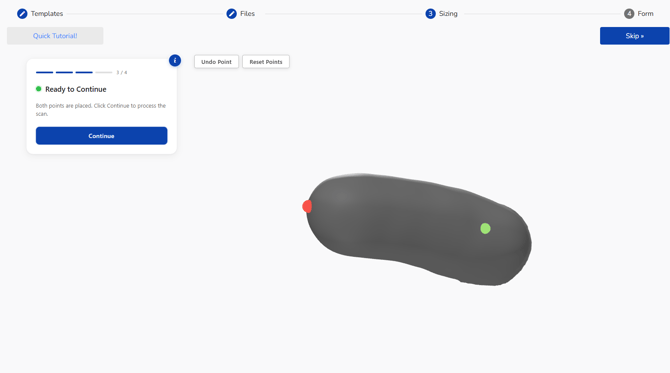
Undoing a point you don't like
If you've placed a point somewhere and don't like how it looks you can hit undo point to remove the last point placed, or reset points to reset them all
After you've placed both points and are happy with them, press continue.
Verifying your measurements
Here is a quick look at all the features of the verification page. It's the same for AK scans.
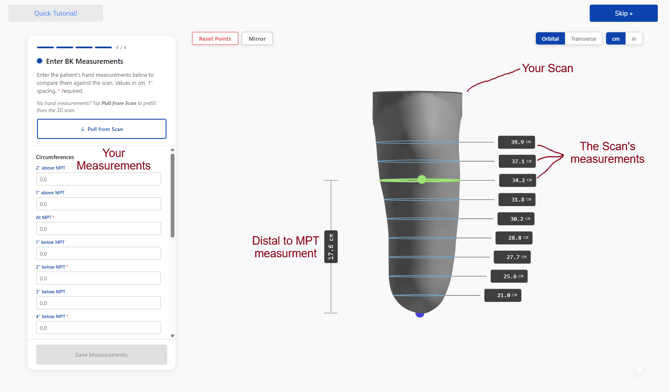
- The measurements on the right are the raw scan's measurements, spaced vertically from the starting point you selected (MPT or Perinium).
- Your measurements: These are the measurements you took of the patient. Fill these boxes out and they will be compared to the scan. You have the option to pull the measurements from the scan if you don't have measurements yourself.
- Distal to MPT: This is the vertical height of the MPT point you placed. You can adjust the vertical height by grabbing the green bar and moving it.
- You can still rotate around your scan by clicking the white space around it to get whatever angle you'd like to look at it in.
Comparing your measurements.
After you place your points, you'll be asked to enter your measurements on the left of the screen. When entered the software will compare your entered measurements to the scan.
If you aren't happy with the height/placement of your MPT/Perinium dot you can click the green line and move it along the vertical access of the socket to the correct location for comparison.
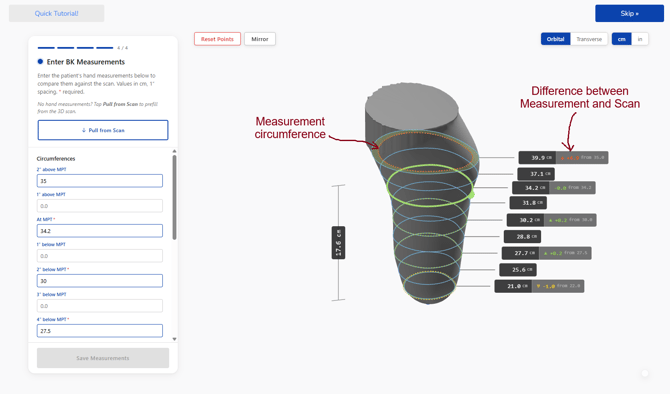
In the above picture we can see that the 2" above MPT measurement is smaller than the scan, but that the knee flexion is likely causing the discrepancy.
- It will display the difference between the two numbers on the right.
- Green is within 7 mm
- Yellow is 8-20 mm
- Red is a difference larger than 20mm
- There is also a ring showing the circumference you entered in the shape of the socket so you can visualize how your difference looks.
Going with Measurment or Scan
Once you have everything filled out, you can hit save measurements in the bottom left. Once you do you will be prompted to choose between Going with your Measurement or Going with your Scan. If you go with measurements, the socket will be resized to those measurements. If you choose go with scan, we will leave the scan as is.
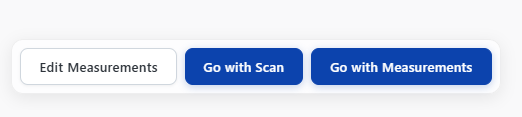
This will transfer directly to the workorder so you don't have to fill your measurements in twice! After the sizing is set, we will then apply whatever sizing changes (e.g. reductions) and modifications you requested.
If you have any questions you can Email: success@protosthetics.com